A modern sound system will very quickly overwhelm your 240Z's little 40-amp alternator in just seconds. That electrical system that could barely run an AM radio and two speakers back in 1970 now has to power amplifiers that pull more juice than the whole car used to need.
Most installation failures happen right at the battery - usually within the first 18 inches of wire. Poor fusing has actually caused fires that destroy these classics year after year. Your Z's thin factory wiring and those corroded ground points create serious hazards that just aren't found in modern cars. We have to handle this upgrade carefully while balancing what the car can actually take, as we keep it original where it matters the most.
This job calls for techniques made for the 240Z that you won't see in a modern install guide. Each step protects your investment and those irreplaceable original parts that make these cars so unique. The following sections will show you how to add modern audio without messing up your Z's wiring or causing any harm to the car.
Let's go through the steps to get your 240Z wired safely for great sound!
Table of Contents
Why Your 240Z Has Electrical Problems
Your 240Z rolled off the production line with a pretty modest alternator that only puts out somewhere between 35 and 40 amps. Back in 1970, that was more than enough power for everything you'd want to run - the most power-hungry component in the car was probably just the heater fan. They can pull around 30 amps all by themselves, so you can imagine how this creates big problems once you start upgrading your sound system.

Your Z's wiring harness wasn't built for today's power needs either. Most of the circuits use 16 - or 18-gauge wire. Wiring up a car today, you'd probably go with 12 or 14 gauge for the same jobs. Datsun's engineers back then had no idea that car owners would eventually want to pump a thousand watts of audio through those same little wires.
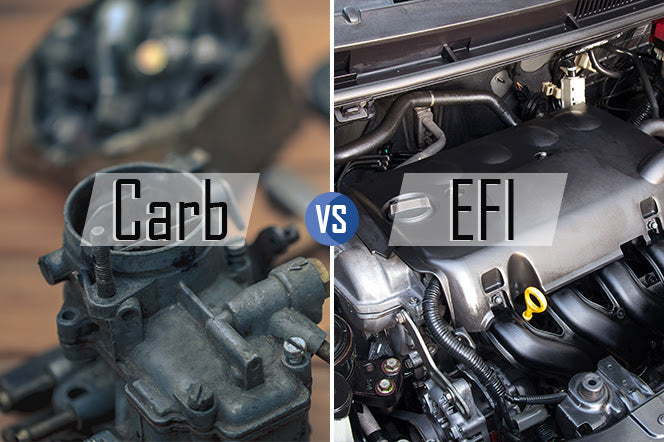
Your 240Z also has that old points-based ignition system to deal with. Points open and close over and over as your engine runs, and each time they do, they send electrical interference straight through your audio system. It comes through as this annoying, fast-ticking sound that speeds up as the RPMs climb. Modern cars avoid this headache altogether because they all switched to electronic ignition years ago.
Your Z's unibody construction also creates electrical problems. Body panels carry electrical power back to the battery instead of dedicated wires for everything. Once rust or corrosion eats away at these panels, it breaks that electrical path and forces the power to try to find some other way back home.
Corrosion loves to attack the area around the battery tray and the spare tire well. These areas like to soak up moisture and eventually rust right through the metal. Once the metal starts to thin out or develop holes, your ground connections become very unreliable. A bad ground connection will make your entire electrical system act in unpredictable ways - your amplifier might suddenly cut out for no reason, or it might just refuse to turn on altogether.
Power and Fuse Setup for Audio
This classic car wasn't built for today's high-powered audio gear, and upgrading the sound system in a 240Z becomes quite a job. Factory alternators in these cars only put out around 50 amps on a normal day, and the original wiring harness uses 18 or 20-gauge wire throughout most of the car. That wire thickness just can't safely carry the power that modern amplifiers and head units pull.
You actually need a fresh power wire running straight from the battery to wherever the new gear will sit. Most head units work fine with 12 or 14-gauge wire. Amplifiers require much thicker cable, though. Your gauge choice depends on two factors - how much power your particular gear pulls and how long the cable has to run.

This next part is where many enthusiasts slip up and could end up setting the car on fire. Every power wire needs a fuse installed within 18 inches of the battery terminal. There's no wiggling out of this requirement, and it's not optional. Most head units are happy with a 10 - to 20-amp fuse. Amplifiers require bigger fuses that are sized to their actual power ratings.
Check if the stock alternator can even keep up with the extra electrical load. Add up the amps that each component will pull. Most parts have the fuse rating printed on them, or you can divide the wattage by 14.4 volts and do the math yourself. If the total climbs toward 40 amps or more, you're probably looking at an alternator swap because the engine, lights, and the rest of the car still need their share of juice.
One big advantage the 240Z has over lots of newer cars for audio installs is the battery location. It sits right in the engine bay instead of being buried in the trunk, so you don't have to snake the power cable the whole length of the car. Unfortunately, the engine bay gets plenty hot, so use well-insulated wire and run all the cables well away from the exhaust manifold and headers.
How to Make Better Ground Points
Grounding your audio system in a 240Z presents a challenge. These cars use unibody construction, and that means the whole chassis is welded together into one big piece. You'd think this would make grounding simple. That assumption can get you into trouble fast, and you'll wind up with problems that just don't show up in modern cars.
Your best bet is to create your own ground points instead of relying on what Nissan gave you back in the day. Look for some solid, sturdy metal somewhere close to where your amp is going to live. Sand the area down until you can see bare metal, since paint and rust are terrible for conducting electricity. Use a star washer in there - those little teeth will cut right through any oxidation left behind after you crank the bolt down tight. Once you get everything locked in place, smear some dielectric grease over the whole connection.

Stay away from anywhere near the fuel tank as you're picking your ground area. Another place to avoid completely is the battery tray area. These old Z cars love to rust through the whole section over the years. You don't want your ground connection to disappear after the metal finally rusts through.
All the unibody metal connects together anyway, and you'd expect that the factory ground connections would work just fine. Many owners are caught off guard by how much their electrical performance gets better when they run a dedicated ground wire straight back to the negative battery terminal. After decades in place, those original connections slowly pick up corrosion and build up resistance. A fresh wire bypasses that build-up and gives you a strong path back to your battery.
Multiple ground points sound like smart insurance. They can actually cause problems if you set them up wrong. Electricity finds two separate paths back to the battery and then creates something called a ground loop. This annoying problem shows up as a whining noise through your speakers and changes pitch right along with your engine RPM.
Safe Routes for Your Car Cables
Cable routing in a 240Z can be simple once you find the existing entry points. Most cars already have a main firewall grommet located on the driver's side, right near where the clutch pedal is mounted. This grommet already has the factory wiring harness passing through it, and you'll usually be able to thread your power cable alongside that existing bundle without much trouble. Up higher on the passenger side, there's another grommet that works perfectly for feeding speaker wires into the cabin.
Heat management starts to matter with these installations, and the exhaust manifold area is absolutely the last place that your cables should end up. Temperatures there can reach over 600 degrees during hard driving - that's plenty to melt through wire insulation in just a few minutes! Routing through the transmission tunnel provides a much safer path since it stays much cooler throughout the entire run.
Audio interference can ruin your installation if you're not careful about where you run your cables. Power cables and RCA audio cables need to stay at least 18 inches apart, or you'll wind up with that annoying alternator whine blasting through your speakers every time you hit the gas. Running the power cables down the driver's side as you send the RCAs along the passenger side works well - this gives you plenty of separation and helps keep your whole setup clean and organized.

Installation gets tough in the dashboard area since the 240Z doesn't give you much room to maneuver back there. Most of the available space is taken up by the heater box, and you'll need to take your time when threading your cables around it to reach the center console area. This part of the job calls for patience and bright lighting - you need a flashlight because those sharp metal edges will snag and damage your wires if you're working blind.
There's an extra safety consideration worth mentioning about the passenger side routing path. Fuel lines make their way from the tank to the engine bay along this same path, and your cables need to stay away from these lines at all times. Never use the fuel lines themselves as support points or as tie-off locations for your wiring. Any new holes you drill should be sealed quickly with rubber grommets and quality silicone sealant. Water that gets in will create rust problems that these cars are already known for having.
Head Unit Options That Protect Your Dash
Your 240Z's original radio slot was designed back when head units were much smaller than the ones we see today. Any modern head unit you want to install just won't fit without major changes to your dashboard. And frankly, dashboards like yours are becoming more and more rare and expensive - clean original ones usually set you back anywhere from eight hundred to fifteen hundred dollars today.
Fortunately, a few simple tricks can solve this size problem. Your glove box actually makes a great hiding place for a modern head unit, and it lets you keep your original dashboard untouched. Another nice choice is the center console - especially if you want easier access to your controls. Either option lets you keep that authentic classic interior look that makes these cars so attractive.

Some owners really want their head unit positioned right where the original radio was meant to sit. Once you decide to cut into that dashboard, there's no turning back. Once you slice through that soft vinyl and the particle board underneath, the damage is permanent. These old dashboards are pretty fragile, and you'll need to be very gentle with each step of the process. Using a fine-tooth saw and taking your time with each cut is the best strategy for this job. After you've made your opening, you'll definitely want to reinforce those fresh edges because the particle board in these dashboards has a nasty habit of crumbling and falling apart. Adding some metal brackets around the new opening can help to support everything well and stop any more damage over time.
You can also find a period-correct head unit that drops into the original opening just right. Some wiring challenges will still need sorting out, though. Original speaker wires use completely different connectors than the ones that are on modern equipment, and you'll need to get some quality adapters or install new terminals to make strong connections throughout your system.
How to Install Speakers Without Damage
Door panels on these classic 240Zs are paper-thin, and they make sound-system upgrades a big pain. Mounting a modern speaker directly to these panels will cause flex and rattling that'll drive you nuts because the metal just wasn't built for the weight and vibration that comes from today's speakers. You should add some reinforcement brackets behind the mounting points first or cover the whole door panel with sound-deadening material.
Just skip the doors altogether and mount your component speakers in the kick panels instead - it's a much better way to go. Your original door cards stay untouched, and the sound quality actually gets better. Better stereo imaging comes from the kick-panel location because they angle toward your ears instead of firing straight across the cabin.

Rear deck areas have their own problems. That thin sheet metal develops stress cracks around the heavy speaker magnets after just a few months of everyday use. Steady vibration slowly works the mounting holes wider until your speakers start to sag and rattle. Marine-grade MDF baffles work great when you need to spread that weight across a wider area of the deck. Cut them to fit between your speaker and the deck metal. This small addition prevents most of the stress-crack problems that plague these setups.
Another important detail about door speakers that most installers miss is the water-drainage channels. Channels at the bottom of the doors are designed to carry rainwater away from the interior. Blocking them with speaker wire or mounting hardware will cause annoying puddles to pool in your floor pans. Run the wires high and put the mounting hardware above that drainage path.
Don't get too aggressive when you're tightening down the mounting screws either. Metal on these old cars is thin enough to tear like tissue paper when overtightened.
Build Your Dream Car
A modern sound system that plays nicely in your classic Z car starts with understanding what these cars are all about. Datsun built these beauties decades before anyone even thought about the power levels that today's audio gear needs. Once you start cutting into that original metal or drilling holes through those panels, well, that's it - there's no way to undo that damage. Careful work and basic safety protocols will give you an installation that looks factory while delivering the sound quality you're after.
Safety fundamentals are simple once you get the basics down. Your main fuse needs to go as close to the battery as possible, and those power cables should stay far away from fuel lines and anything that gets hot from the exhaust system. Ground connections are where many installers run into problems - you need them to be scraped down to clean, bare metal and protected from corrosion. You should plan your whole setup before even picking up a tool to stop those expensive mistakes with original parts that cost more every year and get harder to track down. It means that you'll spend most of your time measuring and double-checking instead of actually wrenching on the car.

Building your classic Datsun into just what you want takes the right parts, and at Skillard, we have everything that actually makes sense for these cars. We know that upgrading classics means that you hit that sweet spot between modern convenience and keeping what makes these cars so special. Our parts catalog focuses specifically on the 240Z, 260Z, 280Z, and other classic Datsuns, so you'll find everything from lightweight aluminum door cards to center consoles that will finally give you some useful storage space. Maybe you need bumpers or spoilers to add some attitude or any other parts for your build - we stock pieces that fit right and last for years.
Check us out at Skillard.com to see everything that we carry and to find just what your Datsun project needs.