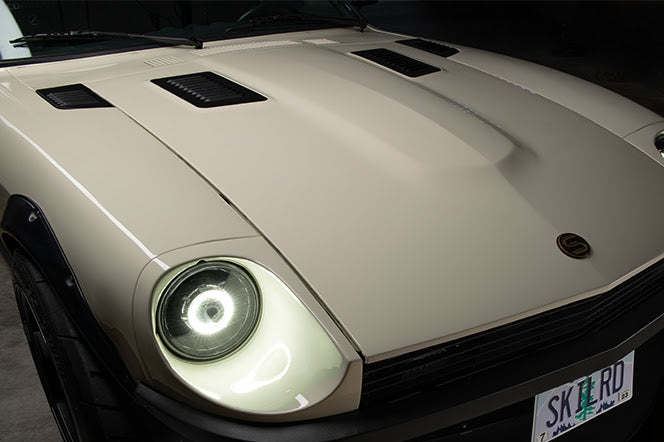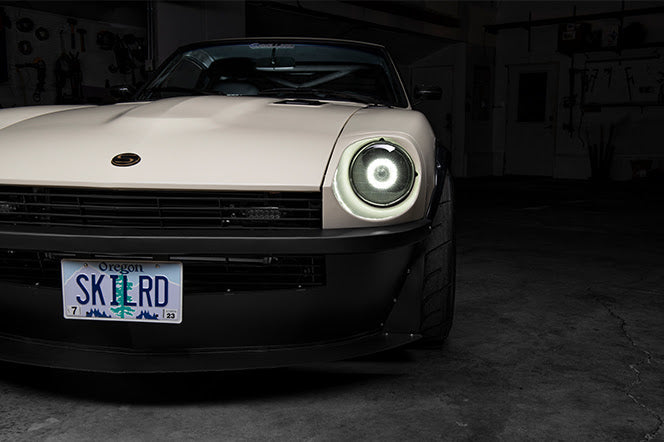
An easy headlight upgrade could give you a much better driving experience. When it comes to classic cars like the Datsun Z, improving your nighttime visibility and safety is a great move.
Headlight technology has come a very long way in the past 50 years. If you're a seasoned car enthusiast or just even starting out, a headlight upgrade is almost always a good move. Modern lighting options, like halogen, HID, and even LED, help a lot with brightness and also with energy efficiency. Plus, these older Datsun cars (240Z, 260Z, 280Z) have headlights that need some attention because of their age.
This guide was made just for Datsun enthusiasts and classic car restorers like you who are looking to help with their vehicle's performance.
So, let's jump right in and get started!
Disclaimer: This article is authored by a member of the Skillard community and reflects their personal views, not necessarily those of Skillard. We welcome your feedback and corrections in the comments to help us continually improve this content.
Table of Contents
Headlight Options for Datsun Z
When you're thinking about upgrading the headlights for your Datsun 240Z, 260Z, or even 280Z, you have all kinds of options that can help with both performance and aesthetics. The original halogen lights that came with these cars are decent, but maybe you're looking for something with better visibility and a more modern look.

Have you thought about the benefits of moving to HID or LED systems?
- HID lights are a good choice for their intense brightness and long range. That can make a difference during your nighttime driving. But they might be a bit more complicated to install and sometimes need some extra parts like ballast and wiring changes. You may get some flickering issues, and they put out more heat, so you have to use special headlight glass. You don't want to melt a pair of plastic headlights.
- On the other hand, LED headlights are popular because they last longer, use less energy, and are easier to install. They also run much cooler. Just to give you an example, Silvermine Motors LED headlights are a great option, with high and low beam functionality. They push up to 7500 lumens. These headlights fit right into the stock headlight buckets and have aluminum cooling fins to avoid overheating.
What's your primary concern when you think about an upgrade? Is it brightness, longevity, or maybe ease of installation?
If you're thinking about aftermarket options, popular companies like HELLA and AutoPal have strong choices. HELLA halogen headlights, just to give you an example, have better brightness and beam pattern compared to stock-sealed beam lights. Although you may need to upgrade the headlight harness to handle the increased power draw, HELLA's trusted brand reputation makes it a worthwhile investment.
Do you think the extra effort of upgrading the harness is justified by the improved performance? Totally worth it!
Another useful option is the AutoPal H4 Ecode Headlights. They use Narva XB3 bulbs to give an important upgrade over the stock lights. These headlights have an even better beam pattern and increased brightness. They're a direct replacement for your Datsun's original units - it makes the installation process easy. They also have 7" Round LED Headlights with a 6000K color temperature and H4/9003 LED bulbs. They have a bright white light and are designed to be an easy plug-and-play replacement.
Finally, let's not forget the aesthetic effect of your headlight upgrade. Companies like Dapper Lighting have LED headlights with all kinds of designs, like modern switchback halos and RGB halos. These options keep the classic look of your Datsun Z while giving it a fresh and updated appearance.
The Benefits of a Headlight Relay Upgrade
Believe it or not, this is one of the best upgrades you can give your headlights.
When you're thinking about adding a headlight relay in your Datsun Z, there are a few useful benefits you should know about.

First off, you'll lessen the load on the headlight switch. Originally, all the electrical load went directly through the headlight switch and that could cause it to overheat and eventually fail because of high latency. But when you install a relay, the high latest is rerouted straight from the battery to the headlights. The headlight switch only works with the small ones needed to activate the relay. This big change reduces the electrical load on the switch and also makes it last longer and work more reliably. Have you ever had a headlight switch fail because it overheated? That's a bummer!
Next, you'll see a big improvement in headlight brightness. Relays make sure your headlights get a full 12 volts directly from the battery. The old wiring and switch usually reduce the voltage because of resistance and that makes the lights dimmer. With a relay, you'll see a clear improvement in how well you can see at night and general driving safety. Many users have talked about how much better their headlights perform after doing this upgrade. Seeing clearer during nighttime drives definitely makes the whole experience better, right?
With the reduced load and better voltage delivery, you can safely use bulbs with higher wattage. This makes your headlights brighter and also improves their efficiency and effectiveness without risking any damage to the switch or wiring. Bright idea, isn't it?
Your vehicle's electrical system will become more reliable overall. These are regular problems in older vehicles with worn-out switches. The reduced latest load also prevents overheating and oxidation in the headlight switch.
The installation process is pretty easy. Many Datsun headlight relay upgrade kits are designed to be plug-and-play with the original connectors. Even if you have limited experience with car electronics, you'll probably find this upgrade accessible. The easy installation means you don't need to be an expert to make these helpful improvements!
How to Remove and Replace Headlights on Your Datsun Z
To remove and replace the headlights on your Datsun Z, you need to start by popping open the hood and locating the headlight assembly at the front of your car.
First, you'l have to remove the headlight trim, which means you have to loosen a few bolts to get that off. There are a couple under your hood on the inside, and one up front.
Once you have a clear path and the painted piece around the headlight is removed, you can grab a Phillips head screwdriver and take out the three small screws that are holding your chrome retaining ring in place. That ring holds your entire headlight in place.

With the ring off, you can gently pull the headlight forward - that lets you get to the wiring harness and carefully disconnect it. Easy-peasy! It just takes a long time to get everything apart, but it's not rocket science.
Have you come across any rusty buckets while working on your Datsun Z? If so, it might be a good idea to check if they need to be replaced or fixed. Rust can mess up the way your headlights work and how easy they are to install. You may want to use some penetrating oil to loosen any rusty screws or bolts. If things are too far gone, it could be worth your while to swap out the old hardware to avoid problems down the road. Rust never sleeps! And buckets are pretty cheap. You can even 3D print some Datsun headlight buckets. Nobody sees them anyway, right?

Now, to put in the new headlight, position it back in the assembly and reconnect the wiring harness. Make sure the connection feels secure before you put the chrome retaining ring back on and screw it down. Remember to test the headlight to make sure it's working right before you finish up the installation.
It's a good idea to aim your headlights properly for the best visibility and road safety. Park your Datsun Z on a level surface about 25 feet from a flat wall or a garage door. Once you're set - turn on the headlights and use painter's tape to mark the centerlines of the beams on the wall. You'll find adjustment screws on the top and side of the headlight assembly. With your Phillips head screwdriver, align the beams with your marks, and that will make sure the top of the beam is at or just below the horizontal line.
Poorly aimed headlights can blind other drivers and reduce your own visibility. Always double-check the alignment by driving and make any adjustments needed to steer clear of these hazards.
Remember to take care of your headlights - it doesn't stop at installation! Regular checks can help you avoid misalignment and make sure you're safe on the road. A little penetrating oil can be a lifesaver if you hit any stubborn screws or bolts. Replacing old and corroded hardware can make future adjustments easier!
Headlight Parts and Maintenance
Let's jump right into the process so you can have those headlights shining brightly again!
First, to remove and replace the headlight bulbs, just take off the headlight trim ring. Loosen up the screws around the chrome ring and give it a little clockwise twist to get it off. With the trim ring removed, pull the headlight assembly out and unplug the wiring harness, then go ahead and take out the old bulb from the bucket. To put the new bulb in, you just place it into the bucket and reconnect the wiring harness and that makes sure everything fits securely. Easy, right?
Next, dealing with headlight buckets takes a bit more time. So, follow the same first steps to take off the headlight trim ring and bulb. Once you've done that, then unscrew the headlight bucket from its mounting points. In some models, you may need to reach screws through the wheel well.

After you have the old bucket out, place the new one in and secure it with the screws. Remember to move any existing hardware and the inner headlamp bucket over for an easy swap.
The process for headlight rings is pretty easy. So, after you take off the trim ring, just line up the new ring and secure it with screws to make sure it fits snugly around the headlight. Ever struggled to get these rings to sit just right? This can be much harder than it sounds, so take your time.
When you need to replace headlight switches, get to the switch that's usually located behind the leading wheel cover. When the cover is removed, check the switch for some voltage and continuity based on the instructions in your manual. If the switch seems faulty, unsolder the wires, remove the switch, and put in a new one. Finally, solder the wires back in place and put the leading wheel cover back on. The headlights run a lot of latest through this switch, so I wouldn't be surprised if you have to replace yours. They get pretty gunked up, also if you still have the 50-year-old original switch.

Look closely at wiring and connectors. Look for signs of damage or corrosion and clean or replace the wiring as needed. Upgrading to a new wiring harness could be a good idea if you're thinking about switching to LED or HID lights. This will make sure a full 12 volts gets to those headlights. After making any changes, reconnect everything and test the headlights to make sure they're working right.
Note: Extended headlamp buckets might help fit drivers or ballasts and that makes the installation a lot easier. Updated headlights can have longer bulbs or bulkier wiring, also HIDs, so you need deeper buckets to make room here. Replacing the headlight seals can keep moisture and dirt from messing up your new headlight setup.
Build Your Dream Car
Upgrading your Z is such a rewarding experience! Headlights are no exception. When you double or triple the output of your lights, it makes a big difference in drivability and looks.
If you're a seasoned car enthusiast or someone who's just starting to look at the space of classic car upgrades, these projects can teach you so much. There's a sense of excitement when you finish a complicated upgrade and see your vehicle's transformation right before your eyes, right? Moments like these can make lasting memories and give you a deeper appreciation for the artistry involved in these cars.
On that note, why stop at headlights? Upgrading a classic car opens so many possibilities. Each improvement leads to the next exciting project. When it comes to continuous improvement, we at Skillard know the passion Datsun enthusiasts have for keeping their cars in top shape.

We make some pretty cool custom parts for these cars, suchas models like the 240Z, 260Z, and 280Z, and we will make sure there's something for every restoration or upgrade project. From bumpers and aluminum door cards to center consoles and spoilers - our dedication to quality and innovation is clear. You'll love it!
So, why wait? Start or continue your Datsun project with Skillard. Check out our full catalog at Skillard.com and find the perfect parts to bring your automotive vision to life. Your process towards improving both the look and the functionality of your classic Datsun is a few clicks away!