

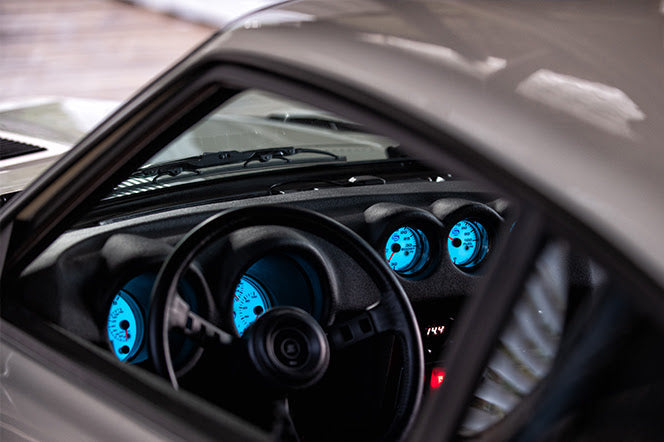
Fresh weatherstripping can help make your S30 stay dry and quiet. These seals will help block out water noise and fumes to improve your driving comfort!
Fresh seals can change your ride and this guide covers how to remove the old weatherstripping. You'll learn to choose the right replacements and install them while thinking about the seal type, the vehicle's status, and different installation methods.
Fresh weatherstripping will only help to improve your S30's comfort and protection. Let's get started!
Table of Contents
Remove Old Weatherstripping Carefully
When you start to remove the old weatherstripping, it might look a little scary. But you just need a few of the most basic tools to get yourself started. Your toolkit for this job should have a plastic putty knife and a flathead screwdriver (make sure that you wrap it up in some tape so you don't accidentally scratch your paint job).
A hair dryer will become a big help during this project. The heat does wonders to soften up some of that stubborn and old adhesive. You should keep the heat moving in slow circles or you might accidentally damage the paint and the trim around it.
Time and patience really make a difference for this job - trust me on it. The first time I tried for this, I got way too impatient with a tough section and ended up leaving nasty scratches in my door jamb. Those scratches eventually turned into rust places later on.
Most of the weatherstripping will start coming loose once you get your putty knife underneath it. You should move very slowly along the entire strip while pulling up on it gently. Whenever you hit a section that just won't budge, grab the hair dryer again and give it another good blast of heat.

You might come across some weatherstripping that's attached with small nails or clips instead of adhesive. These pieces usually will come out once you find out where they're connected. Just don't pull on them too hard or you might accidentally tear off some of the surrounding trim too. The corners and the narrow channels are usually the trickiest parts to work on - that's where your tape-covered screwdriver can help.
You should wiggle it under the edge of the seal and start to work it free little by little. Remember to stay gentle here - you're taking off weatherstripping, not breaking apart some concrete.
That leftover adhesive could be stubborn even after the weatherstripping is completely gone. Products like Goo Gone or 3M Adhesive Remover are good for this part. Just remember to test these cleaners on a hidden area first to make sure they don't hurt any of your paint job.
The job is satisfying - especially when that very last piece comes off smooth and clean. Your future self will thank you for taking the time for this prep work right before putting on the brand-new seals.
Clean And Prep Metal Surfaces
Your car's clean surfaces can help in creating the perfect weatherstripping seals. DIYers often rush through the surface prep and they later manage seals that peel off. You should take the time to remove the old adhesive completely now to stay away from problems down the road.
Goo Gone Pro gets the job done when you need to remove any stubborn weatherstripping adhesive - this product won't hurt your paint. But it still breaks down that annoying and sticky residue well. Just put some of it on a clean cotton towel and rub it onto the surface with a medium amount of pressure.
After the chemicals have done their job you'll probably need to help out with any leftover bits with a plastic scraper. Stay away from metal scrapers or razors because they'll destroy your paint. A good plastic scraper and some elbow grease will safely remove those troublesome places without taking a chance that you might damage the metal underneath.

Now that the residue is gone, you need to give everything one final cleaning. Give the surfaces a good wipe-down with some rubbing alcohol to get rid of the oils or leftover chemicals. This helps your new adhesive create a strong and watertight bond.
You should feel around for any rough sections or uneven areas where the old weatherstripping used to sit. Even small bumps can get in the way of how well your new seals will stick. You can run some fine-grit sandpaper over those problem places to smooth them out without damaging the paint that's around it.
The first time I worked on weatherstripping for my S30, I was nervous about the possibility of accidentally scratching up the paint or damaging the metal. I worked slowly. Taking your time with the prep work means your new weatherstripping will stay put, and keep water outside where it belongs.
Use Adhesives And Position Seals
You should take your time to replace your S30's weatherstripping with extra close attention. You might want to rush through it and just get it done faster. When you take time and have patience with this job, it'll help you stay away from nasty leaks and other problems later.
Have your materials ready and clean every surface. Your first step is to remove all traces of the old weatherstripping and its sticky residue. A gentle plastic scraper works for those stubborn pieces, and it won't hurt your paint job.
The curved sections can give you some pretty tough problems if you're not very careful. Trust me - I learned this lesson when water started pouring into my car during the first rain. Some small spring clamps will help everything lined up while the adhesive dries.
3M Super Weatherstrip Adhesive is a proven choice for this job. Apply a thin layer on the car's surface and your new weatherstripping. Let it all sit for about 5-6 minutes until it feels just a bit tacky before you push the pieces together.

The corners deserve extra attention when you're installing them. These areas take on the most stress, so address those areas first. The straight sections will be much easier to manage once that's done.
The seals for the rear hatch and quarter windows need care as well. Double-check that everything completely lines up with the pinch weld before you add your adhesive. Any incorrect alignment means you'll need to start the entire process over again.
Let everything cure for a full 24 hours. Most people can become antsy and rush through this part. The extra day will help between seals that hold up for years and ones that fail after the first rainstorm.
The tough areas around the windows often cause the most frustration. Some masking tape works wonders for holding sections in place while you work around the curves. This little trick will save you from having to grapple with unruly weatherstripping while the adhesive completely sets.
Think About Weatherstrip Kits And Parts
You can choose a weatherstripping kit for your S30 that'll save you some of the problems and the time spent searching around in the future. You'll find that some Z car owners ran into some problems when trying to piece together individual seals that just didn't quite fit right. A kit means your parts will match well in quality and appearance.
You'll find a few trusted businesses out there giving out kits made specifically for the S30 models. For the early models from 1969 to 1972, the S30 has door seals that fit well.
Vintage Rubber has the broadest set of kits (though they do cost a bit more). You can also grab some good kits from Z Car Depot and California Datsun too at more easy prices. Your Z car's model will help to choose which kit works the best. The windows and doors on a 240Z need some different seals compared to the ones on a 260Z or 280Z.
Some kits might give you extra parts you won't need to use. But others could end up missing pieces that do matter for your year. The different manufacturers can produce changing quality levels. People like Steele Rubber products because they can last for years and fit well.

Most kits come with the main items like windshield seals, door weatherstripping, and hatch seals. The better kits also throw in window channel pieces and the hardware you'll need to get the work done. Premium packages can even include glue and some tools to help you install everything.
The warranty is something to think about when you pick. The best manufacturers support their products with lifetime warranties. This usually means they're giving reliable weatherstripping. User reviews help you to find any long-term problems that aren't completely obvious.
Each company and kit has its own installation facts. Sometimes the weatherstripping fits well. But other times you'll need to adjust things a bit. Door seals can be especially tough. If they're too thick then you'll likely have a hard time closing your doors. This kind of mistake means you'll spend your time making adjustments later on.
Tackle Rear Hatch Seal Challenges
The rear corners and surrounding places of your S30's hatch are the prime areas for water to sneak in - it makes these sections more open to leaks. The weatherstripping can break down faster in these locations because dirt and moisture like to find their way there.
Good alignment will help you stay away from any problems later on down the road. Small gaps from poor alignment can create some annoying rattles and drafts while you're driving. They let water seep in and could wreck your interior over time. Your life will be easier if you take the hatch off first, even though you could technically replace the seals with it still attached.
The hatch is pretty heavy and awkward to manage on your own. So ask a friend to help you remove it unless you want to risk dropping it or hurting yourself in the process.

Those corner sections deserve some extra care because they experience the most use during normal use. Some clamps or masking tape will keep everything lined up nicely while your adhesive dries.
The rubber seal has to be set and oriented correctly before you even think about putting any adhesive. Take some time and be sure to test fit the seal around the entire opening to check its length and positioning. Weatherstrip adhesive will need some patience and fresh air.
Instead of trying to rush everything at once, manage small sections one at a time. Each section should be completely dry before you move on so your seal doesn't slide out of position. A wrong placement means you'll waste materials and may need to start all over again.
The main challenge comes from maintaining the right amount of pressure while your adhesive sets. If you press too hard, then you'll squeeze out adhesive you need. If you don't press hard enough, this creates weak places that could fail later. Practice and paying close attention helps you find that perfect balance.
Watch For Common Kit Issues
You'll need to plan ahead and stay away from some of the common mistakes to get better results with your S30's weatherstripping project. S30 owners sometimes tell you about buying generic seals without first checking if they'll actually work for their car. Your car can end up with some annoying wind noise and water leaks if you pick the wrong size or shape - this happens most often around hard areas like the door corners.
I found this out after trying to save a little bit of money with a cheap weatherstripping kit I bought from the internet. The materials seemed okay at a glance but they didn't quite line up with my door channels. Rain started coming inside and the highway drives got very noisy. It even leaked at the self serve drive-through car wash. Those budget-friendly seals also warped just a few months later.
What people sometimes forget is testing how well the seals fit before permanent installation. You should stick the new seals up with some masking tape first to see if everything lines up right. That way you'll also know if your doors and windows still work. This quick check can save you from discovering problems after you've already used the adhesive.

Quality weatherstripping can save you some money and problems later on. The premium manufacturers nail the fitment and use materials that don't warp. These higher-end seals hold their shape a bit longer and give steady pressure where you need it. You'll find lots of reviews about different products and they'll tell you which businesses to stay away from, and what problems they ran into.
S30 enthusiasts in forums and online groups share what worked and what didn't for their weatherstripping projects. You can dodge the same problems by learning from their experiences. S30 owners have had better results with factory-style replacement parts.
Some careful prep work can give you weatherstripping that can last way longer. Your seals will also stick better and stay put if you first clean everything closely. Watch out though - piling on too much adhesive creates more problems than it fixes. A light and even layer works way better than thick globs of adhesive.
Build Your Dream Car
When you take care of your car's seals and the weatherstripping, it changes how your whole car feels and also performs. You'll see the difference when you close a door with the fresh seals - it just helps to create that perfect feel. These little improvements can add up and will make your driving experience even better.
Your new seals do need some love as well. Just clean them with some mild soap and water - and then put on some silicone protectant so they'll work well for a long time.
The new seals can fall apart without care. Take a few minutes every now and then to look after them and your car in a garage where the humidity stays stable. This way, you won't have to manage damaged electronics or nasty mold problems later. A quick afternoon of doing maintenance sure beats spending days fixing serious repairs.

At Skillard, we help car enthusiasts just like you bring your classic car dreams to life. Our tough and custom parts are all designed specifically for Datsun cars. We have everything from sleek bumpers and aluminum door cards to spoilers or center consoles. Whether you're tackling a full restoration or just want to upgrade a few parts, we'll hook you up with what you need.
Head over to Skillard.com and check out our lineup - we have some of the perfect parts to help make your vision come alive.
2 comments
Skillard Team
Thanks so much – we really appreciate that. Comments like this mean a lot to our team, and we’re grateful for the support.
Thanks so much – we really appreciate that. Comments like this mean a lot to our team, and we’re grateful for the support.
Brian Schuster
I just want to say that you guys Rock!! Thank you for All you guys do.
I just want to say that you guys Rock!! Thank you for All you guys do.